Ladders

..I’m surprised myself about the carving result and this got my mind set to the stern.
I’m now convinced that I also should be able to “scratch build” the stern decorations.

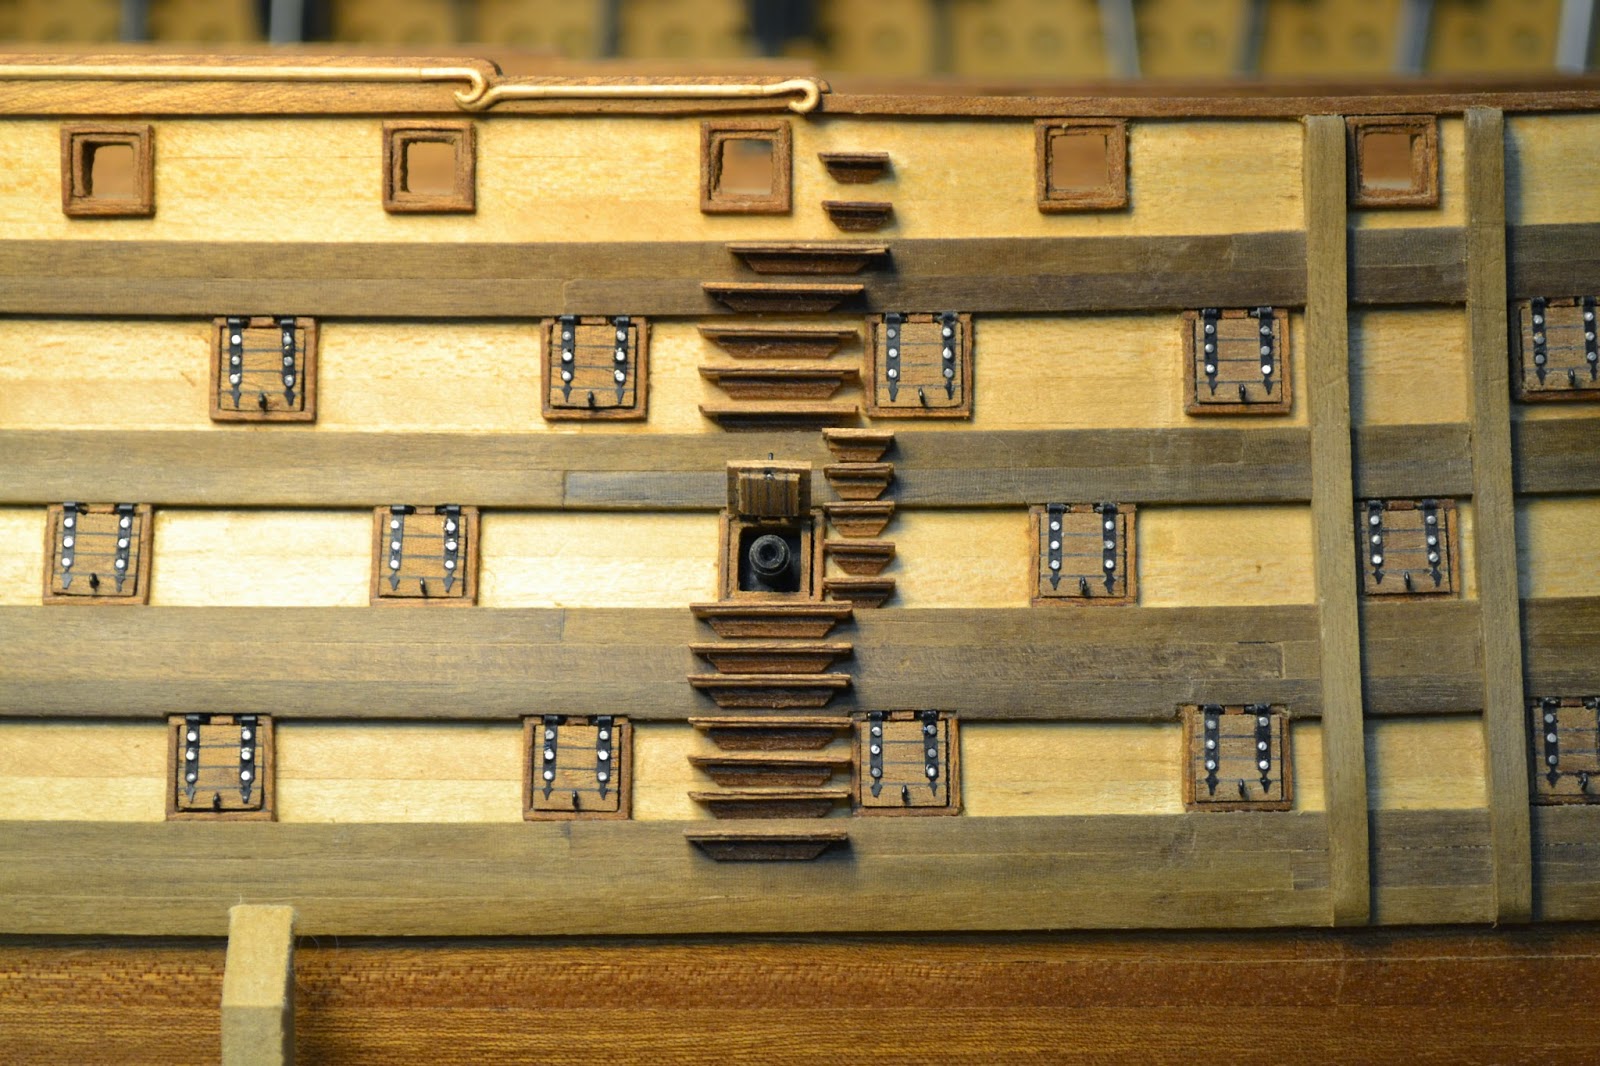
But first the ladders, and, ..“off course” .. I just couldn't resist and had to add a bit more detail.
I wanted an “edge” around the rungs to add more detail and to create a slimmer look.
To achieve this I milled a 2 mm routerbit (with the appropriate depth and height) into my primitively made guide and milled the edge in the list.


After cutting the rungs they became too small to hold them by hand, so I made a “tool” to hold them and milled the remaining edges.


I milled an groove with a round routerbit to get a nicer base shape for the rungs

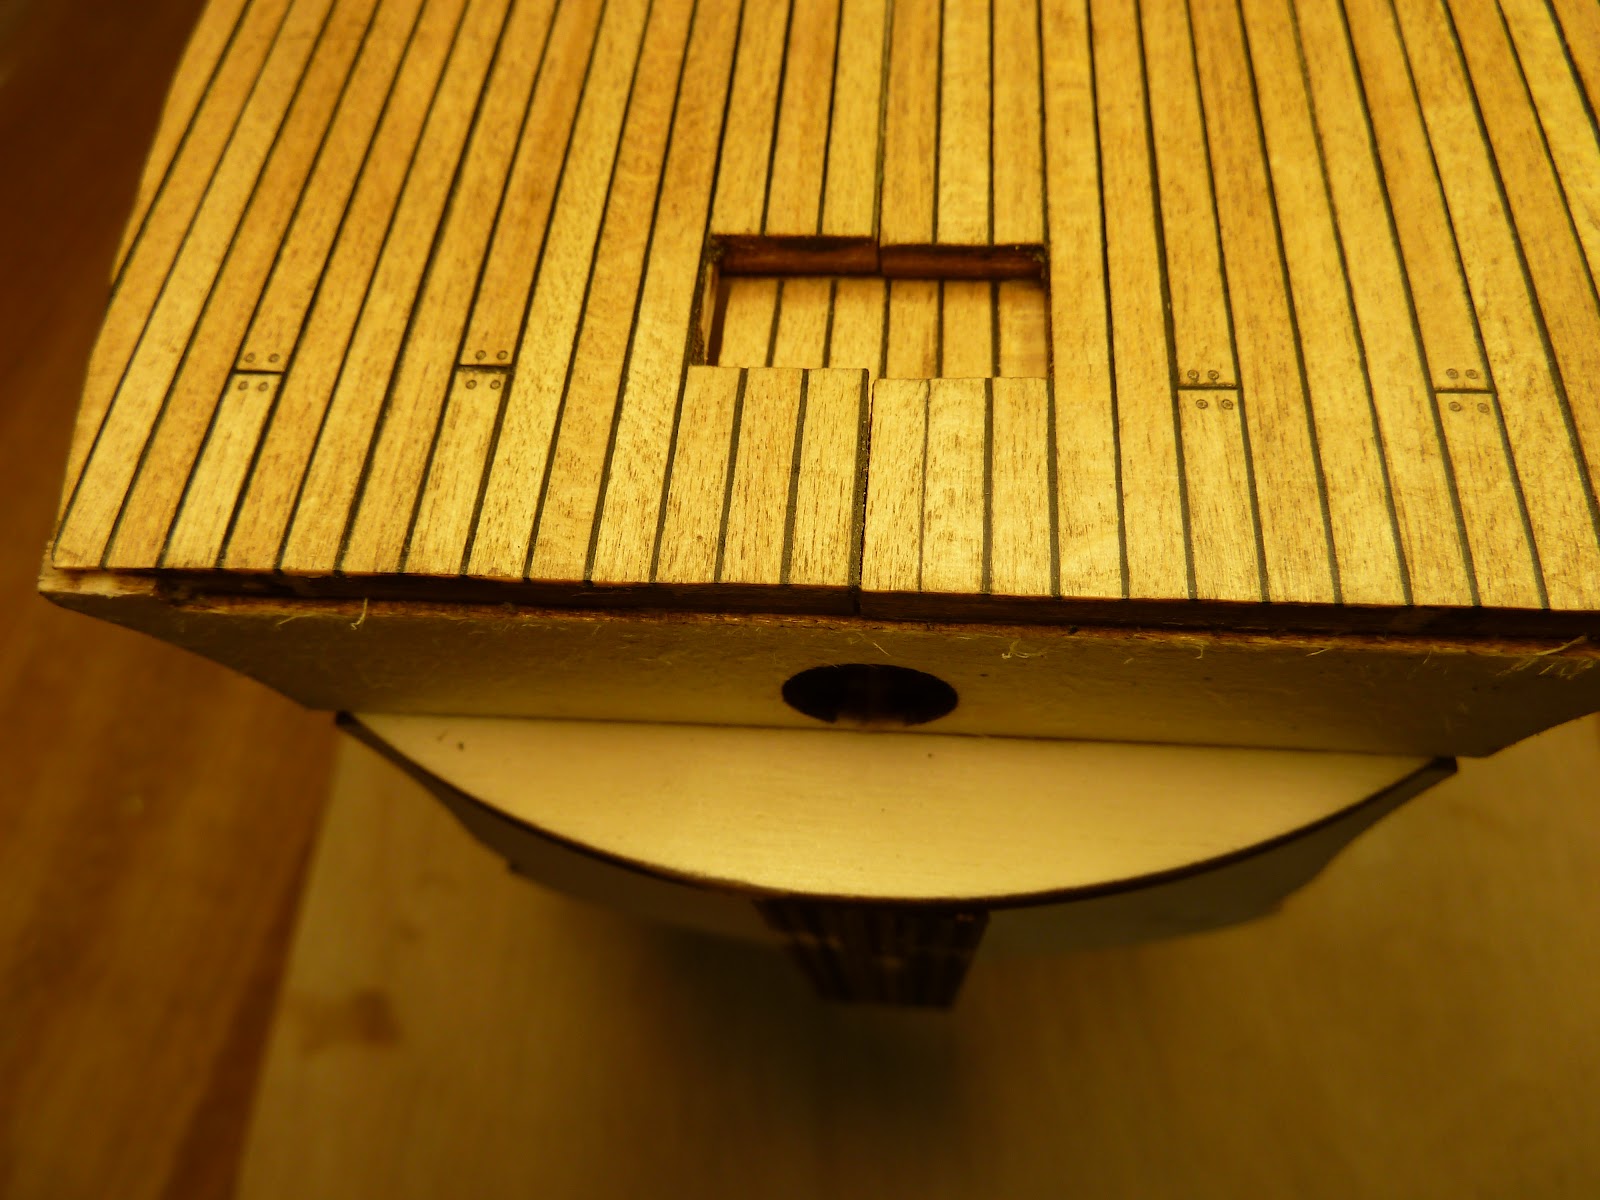
Assembled all the individual pieces.

..And placed them ..


From here the Build posts are sorted in synchronous order: Start of the Project


My latest project has arrived !!
After finishing the build of the Smit Rotterdam (billing Boats BB478) i wanted to build something different.

I decided for my next build the "Santisima Trinidad", an 18 century Spanish first rate ship with 130 guns on 4 decks from the manufacturer OcCre.
The reason for choosing this kit/brand was the positive feedback from other "OcCre builders" and the good quality/pricing factor.


To my big surprise the kit contained 2 boxes

Kit Content (2012)

a few pictures of the content of the kit, the wood looks very good and all the wooden sheets are precut with laser.
Also the fitting parts are all made of wood or metal, so the kit doesn't contain any plastic parts.
If anything bad can be said, it must be the plywood sheets, hopefully they only contain parts which will not be visible.


Wood included in the kit: Ramin, Sapelli, African Walnut & Plywood with different sorts of veneer 


The included Fittings


I found out that the instructions provided where in Spanish only, probably because I ordered this kit through an Spanish web side.
After contacting  Occre Support, they provided me quickly with English instructions.   

False Keel & Bulkheads


Starting with assembling of the false keel, I decided to use white carpenter glue for this task. I also dry fitted the bulkheads (just to see if everything fitted as it should)


In general everything fitted just fine, only minor sanding was needed.
During dry fitting of the crossbeams I discovered a minor mistake made by the manufacturer, the crossbeam holes in one of the bulkhead was forgotten.


Dry fitting the decks


I didn't glued any bulkhead or crossbeam in place yet, I'm still checking if everything is square and fits 
in place. So far it does without any adjustments from my side. 


"Cheating" Decks

In the lower and main deck are some cutouts. According to the instructions 3 small "decks" have to be placed underneath those cutouts, however there are more than 3 cutouts, so "visable or not" I decided to glue some underneath those cutouts as well.


At this stage I still didn't glued anything in place


Planking & caulking effect

After having cut the deck planks in the appropriate length I tried some different techniques for the caulking effect.
In the end I decided for a black piece of (0,2 mm thick) cardboard glued on the planks as being the most reliable one with has an uniform look and looks good at the same time.

testing why doesn't is show

Planks cut in length


covering the cardboard with white carpenter glue


Position the planks "carefully" on the cardboard without using to much movement 


Apply not to much pressure on the planks until the glue has dried


Gently "cut" (several times and without using too much pressure) in between the planks using a sharp scalpel blade until the cardboard is cut 


This will be the result..

Planking of the first deck

This is the result:


I used one of the "cheating decks" as my first try out, I'm pleased with the result.
The next thing will be to find out what i want to use as treenails.

Treenails Manufacturing

I decided to go for "stripes of bamboo" and a homemade drawplate..


As for the drawplate: I cutout a piece of metal (a top plate  from an old car radio) and drilled holes from 1,5 mm to 0,6 mm and sanded them afterwards with grit 600.

For the nails I used bamboo skewers and cut them in thinner "stripes" with a sharp scalpel blade.
After selecting the "finest" ones I pulled/pushed them through the drawplate until i reached the goal :0.6 mm.
This process was actually not as bad as I thought it would be.


But after i fitted the first nails i noticed that the nails where hard to see  (se top nails) so  i decided to use a black marker and gave the bamboo a black coating, i think this gives a much better contrast with the surrounding wood ( se some of the bottom nails)


It might not be so easy to see with the default picture size, but you can right click on the picture and open it in new tab to zoom in for the highest resolution.

Upper Gun deck


Down below my first real planking “the Upper Gun deck”. After giving it some thoughts I decided to give it a "antique" bee-wax polish (normally used for furniture), I think it gives it an more realistic & aged patina look.


This is the end result. But I must say it is difficult to see the difference between them in the default picture size (please enlarge them so you can really see the difference)  ..


Main Deck Planking

 After the upper gun deck I continued with the main deck assembling & planking


The main deck halves are of 2 separate pieces plywood , for stability reasons i glued & taped them together before any planking 


"Just checking", still everything is only dry fitted...


I drilled the holes in the deck planks slightly bigger than the "treenail stick" itself and just pushed it in as far as possible, after this I just cut it and sand the whole deck but first when it is completely finished. And surprisingly not even  glue is needed to hold the nails in place.


Here's a picture of the complete main deck before giving it wax..


Frame positions

After “deck planking” I dry fitted everything and made sure everything fitted as it should before I glued the frames into place .

Just making sure that everything is glued square


Just making sure that everything is glued square 


I use white carpenter glue for the simple reason that it gives me plenty of time for alignments & adjustments in this fase


Gluing Decks into place

After the frames are glued into place, the decks where fitted and glued and I'm still using white carpenter glue for the job. 


Middle deck glued into place


Main deck glued into place


a Gab..

Already during dry fitting of the main deck I discovered an gab between the main deck and the first frame which was impossible for me to fix at the time.


Now after gluing the main deck into place I decided to bridge this gab with an extra plank and a piece of cardboard to simulate caulking


Even knowing that it will not be visible later on, I decided to glue cardboard on the other side of this extra plank as well before planking the front. 


3 layers of decks installed


I’m finished with the front planking and I'm pleased with the planking in general.
However if I could change a thing at this stage, I would have spent more time on good solution for drilling the holes for the treenails in the planks as not all of these are perfectly aligned. 


Bulwarks


Pretty basic and nothing special, I glued the bulwarks in place.

Preparing the Bow for planking

realizing that the Bow will be a planking challenge I decided to glue Balsa wood between the first 2 frames and sanded it in the correct shape